

 | ||||
| Laura Drahozal Remembering Life's Moments |
- Piccolo Snowman from the I'm Snow in Love With You Accents
- 3 Piccolo Acrylic Pieces
- Piccolo 3D Gels in Titanium White, Napthol Red, Orange, Burnt Umber, Ultramarine Blue, Cobalt Turquoise and Metallic Silver
- Piccolo Pure Sparkle Silver Glitter
- Globecraft Glastique
- 9" Grapevine Wreath
- Distress ink reinkers in Walnut Stain
- Paintbrush
- White Acrylic Paint
- Dreamweaver Snowflake Stencil
- Dreamweaver White Glossy Embossing Paste
- Removeable Tape
- Dreamweaver Paste Spreader
- Martha Stewart Snowflake Punch
- White Cardstock
- Art Glitter Faux Snow
- Silver Ribbon
- White Ribbon
- Straight Pin
- Nonstick Craft Sheet
DIRECTIONS:
1) Paint the Distress Reinker with a little water onto the grapevine wreath to darken it. Let dry.2) Paint the snowman with a layer of white acrylic to use as a base under the enamel gels.

3) Use 3D Enamel Gels directly from the bottle: red on the scarf and cap, orange on the nose and brown on the stick arms.

4) Use silver gel directly from the bottle to create shadows on the snowman.

5) Add dots of the ultramarine blue gel on top of the silver and blend with a paint brush.

6) Add white gel on the remaining parts of the snowman. Blend into the edge of the shadow with a paintbrush. Let dry.


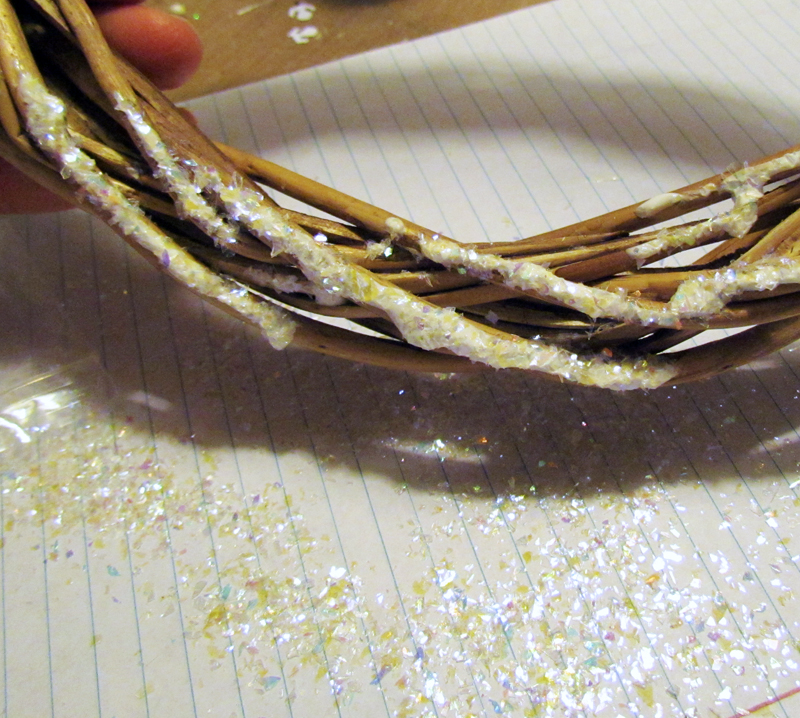
7) Use white gel directly from the bottle on the bottom of the wreath. You don't have to be too particular about the placement.


8) Cover the gel with faux snow. Let dry.
9) Start with the acrylic pieces. They have a blue film on both sides. You will start by removing this film on one side only.
10) Place the side without the film up, and tape it to your craft sheet.
11) Place stencil over the acrylic piece. You will not be able to get the whole stencil in, so be sure to center it the way you want it over the top. Tape down.
12) Use paste spreader and white glossy paste over the stencil. You need to actually touch the stencil with the spreader and pull it across like a squeegeee.
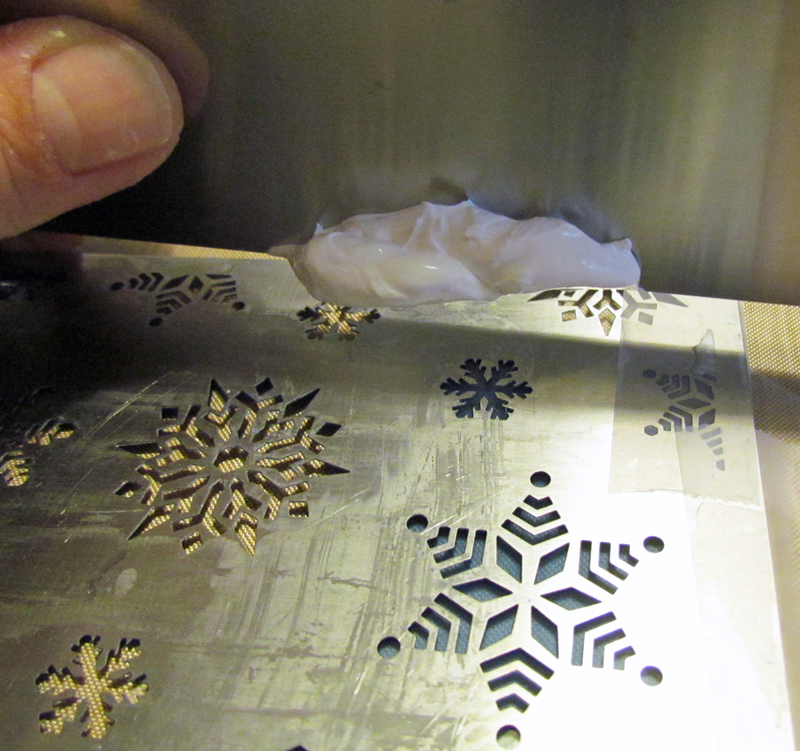
13) Remove the stencil and cover the snowflake with Piccolo Glitter. Let dry.

14) Squeeze on dots of white 3D Enamel Gel. Create some snowflakes, using dots of gels and a straight pin to create detail. Let dry completely.

15) When gel is completely dry, remove the other piece of film and flip acrylic over.
16) Squeeze blue and light blue gel over the back of the acrylic in big curves.

17) Use paintbrush and a little water to swirl colors together. Let dry.


18) Punch snowflake strips from the white cardstock. Punch several of them.
19) Glue the snowflake lengths together with Glastique, matching up the snowflake shapes on top of each other and creating one long strip.
20) Attach snowman to wreath using Glastique.
21) Attach snowflake "ribbon" to the wreath.
22) Make "needle" from tape on the edge of white ribbon and feed through the wreath on the top. Be sure to go through at least two branches on each one. Thread three ribbons.
23) Attach the acrylic pieces from the ribbons. Tie securely.

24) Attach the silver ribbon.
That is how this snowy wreath was made. I was really fascinated by the transparency of the acrylic, so I photographed it through the window, so you could see it, too.
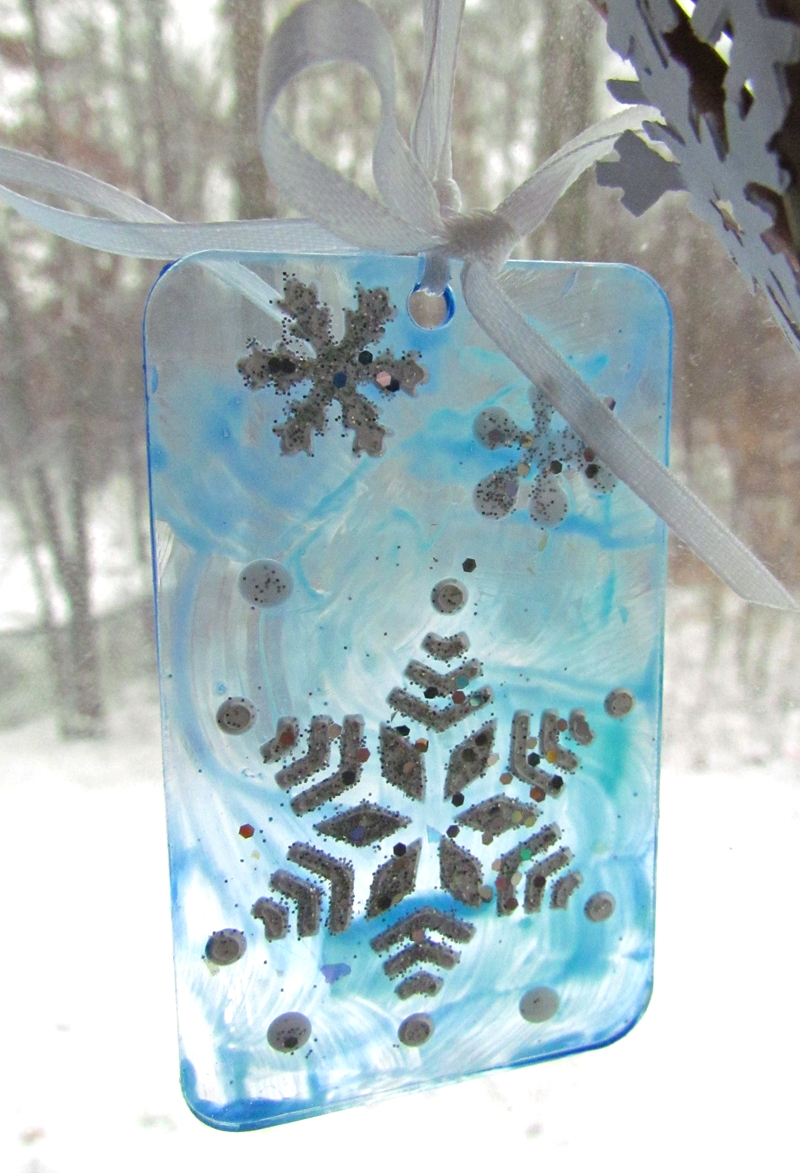
The other interesting thing? If the acrylic piece turns around, you can still see the snowflake through the back of the piece. It just isn't sparkly. See?

I really enjoyed creating this wintry wreath for you. It is something that you can enjoy all season long!
Slide on over to my blog to see what's up over there.

2 comments:
Wow! The techniques used here are amazing! I especially was amazed at how the snowflake was created with a straight pin and dots of 3D Enamel!
This is so cool! The snowman shading is amazing. I can't wait to try some of these techniques!
Post a Comment